

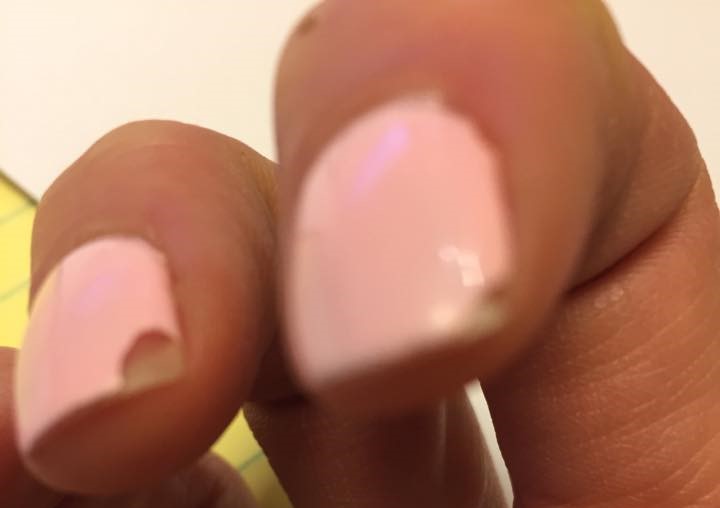
How Can I Repair Gel Polish Chip Nails
PRO/technical version for the boom nerds.
#1. Improper curing times.
Check the instructions on how long each coat needs to exist cured. If yous over-cure the production- it might chip (besides brittle). If you lot under-cure information technology- you might go peeling (soft, uncured gels).
Gels might look hard and shiny when they are cured every bit fiddling as 50%. They need to be cured to about xc% for optimal durability and to avoid permanent skin allergies (way worse and uglier then chipping!).
#two. Improper lamp used.
I'k with Doug Schoon on that. I e'er recommend curing the gel with lamp that was designed to cure that particular gel. Gels are 1 of the nearly complex products to formulate. Don't play chemist.
#iii. Improper positioning.
Client is not positioning their fingers properly/directly under the bulbs. This is way more than common with LED type bulbs every bit their "beam" is way more than direct (doesn't "spread").
The traditional bulbs were a little more forgiving. Sometimes clients put their hands all the style in the lamp (with fingers bent… o madre mia!!) that the tips of their nails are right in the corner of the lamp (where it'southward Nighttime). Why even bother turning on the lamp? It won't help much…. It's like tanning… under a chair or something… or under a tanning bed LOL, what'due south the indicate?! OK, simply seriously, the areas in the shadows or in indirect calorie-free are Not curing properly. Instead of chatting and not paying attending while polishing and curing the nails, brand certain the customer can concentrate on what they are doing making sure their nails are FLAT and positioned properly each time a coating is being cured.
Also, it's easier to polish while the client is not talking 😉
#four. Improper manicure beforehand.
Clients should launder their hands earlier a manicure. Well. This simple step gets rid of virtually of the gunk. Make certain y'all give a client a proper manicure (dry one) earlier applying gel polish. I have many clients request for "polish change". Not a skillful thought. The nails have to be filed smooth (the complimentary edge, not the surface) and any flakes removed. The surface of the nail needs to be pristine. Have a VERY good look at the free edge. Whatsoever nicks, flakes and catches must be corrected.
Majority of the gel polishes out there don't require the surface of the nail to be filed before. A very calorie-free vitrify is more than than plenty (with a buffer that is not a eighty/lxxx file and not a smoothing buffer either). Yous just demand to remove the shine. Once. With continuous manicures I don't even do that. Remember, over-filed and damaged nails will skin more than. Look #ix for more details.
Wipe the nails with fifty/l mixture of 99% booze and pure acetone or prep solution that goes with the line.
#5. Peeling nails.
Gel polishes are designed for reasonably healthy nails. To adorn them. Non to "fix them".
If a customer has a problem with major peeling the gel polish might come off with the peeling smash.
#6. Improper dehydration.
Await #iv simply also brand certain you lot saturate the cotton pad well and concord it in a way that the pad hugs the nail and utilise your thumb and pointer nails (through the pad obviously) to make sure you apply right pressure to the sidewalls where oil and moisture might easily hide. Don't forget about the free border and under. Wipe that area too.
#7. Base coat not pressed in properly to encompass the surface of the smash PERFECTLY.
I have seen that too many times with newbies. They think they comprehend the nail correctly, except that… they don't. Plough the nail to the right and up and see if that corner is covered and repeat on other side. Press the area again with the base if you have to. Get a expert lighting. I have no thought how people work in some of these fancy, dim spas. Good light is a must. And glasses if you need them 😉
#viii. Coats of color too thick.
Refer back #i. The gel might look cured but it might non actually be. Thinner and most chiefly, even coats are a key. If you lot need to, use iii coats.
My personal trick- when applying more difficult colors (pastels or streaky colors) I apply the base every bit usual and I and then apply a sparse coat of clear or almost clear colour. Cure that a full cure. Any color will go on much better on peak of cured coat of clear color vs. cured base of operations (nearly of them afterward cured notwithstanding take that "wet and slippery" experience).
#ix. Damaged nails.
Simply similar over-processed pilus that doesn't "hold" color, damaged nails or nails that clients picked or peeled the production off will have hard time bonding with the gel smooth (or gel polish bonding with them actually).
When these meridian, most dense layers of the nail are gone (overfilling or picking) the more "spongy" nail layers underneath get exposed. Those layers don't bond with product well.
Keep those nails healthy. Insist that clients keep regular appointments if they decided to have their nails enhanced. That decision comes with some responsibleness. Once the nails start peeling or chipping it'southward likewise late to be calling for an engagement. Regular, bi-weekly, in my opinion appointments are a must to prevent damage from happening.
#10. Clients use their nails equally tools.
Nails that are too long for client's lifestyle usually interruption. They don't usually bit, but that is a possibility besides. Sometimes nails that are too square volition bit on the corners. I found rounding up these corners solved the issue with some clients.
Don't forget ane last thing. Some people are just not adept candidates for gel shine. Gel shine is not a fool proof product. If something doesn't piece of work for a client don't experience bad for suggesting another service or.. in some cases, even refusing the service altogether.
About the Writer: Anna
Anna Lajourdie is a globe-renowned nail technician, international educator, and competition winner. She has been featured and published in an array of magazines (Dazzler Cosmedica, Nailpro, Scratch, and Nails Magazine---to name a few). In add-on to working with her valued clients at Polished, Anna works closely with summit industry distributors and travels to beauty shows in Singapore, Poland, Spain, Germany, the U.s.a., and Malaysia to host workshops and classes, and judge nail competitions.

How Can I Repair Gel Polish Chip Nails,
Source: https://www.polished.ca/10-reasons-why-gel-polish-chips/
Posted by: waterswheines.blogspot.com
0 Response to "How Can I Repair Gel Polish Chip Nails"
Post a Comment